Lab:
The Lab is a source of information for Artists and Art Lovers alike. You can find useful information to help develop your career as an artist such as tutorials, interviews, news, and a lot more!

Tutorial: Merging two images in Photoshop by photographer Susana López.
Susana López is a visual artist from Gijón, Spain.
She holds a Bachelor´s Degree in Fine Arts with a specialization in Painting from Barcelona University, from where she also holds a PhD. She focuses mainly on photography and mixed media, where the subjects of her work are taken from and inspired by her personal experiences in daily life. She seeks to reveal this with a distance which reflects an objective and striking honesty. A constant feature in her work is the use of social network to diffuse her projects.
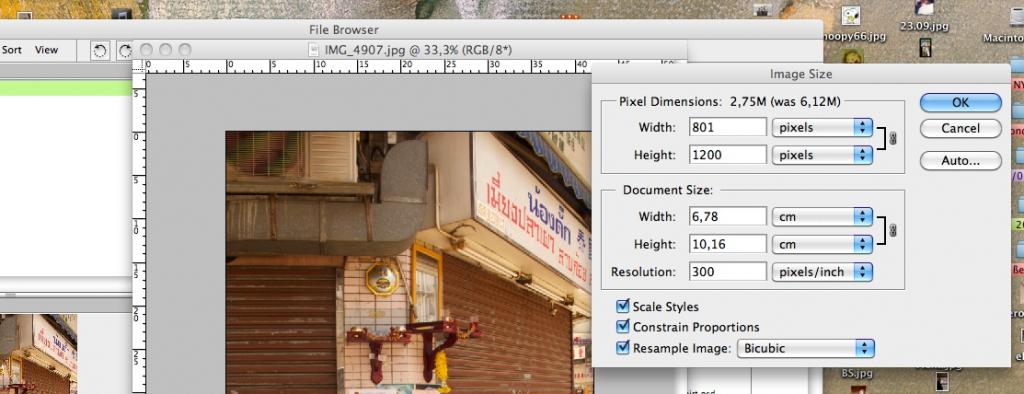
I’d like to start by explaining a couple of simple things about image size.
Digital graphic images are measured in dots per pixels (DPI - dots per inch, or PPI - pixels per inch). 72 DPI is an optimal resolution for on-screen images and a resolution of anywhere between 150 to 600 DPI is suitable for printed images.
So, how can we resize an image in Photoshop? First, open the file and find the image size. This window will allow you to also change the size (width, height, resolution) of the image.
Now we are going to merge two images together in order to make a new one.
First, we have to select and open both images (E.g. File, open and select images). Remember to check that both images have the same measurements.
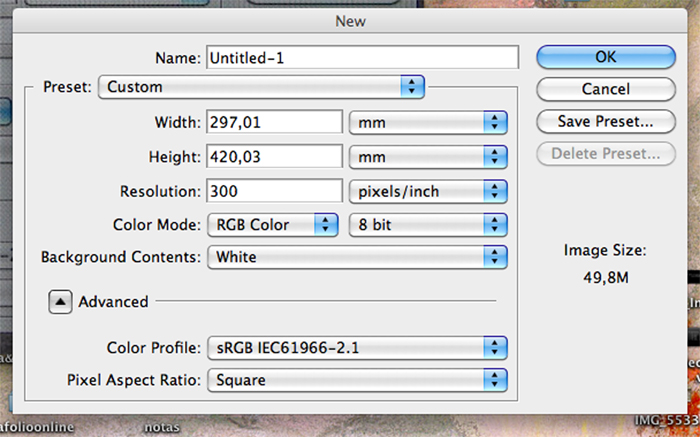
We now need to open a new document to work with.

Name this new file and adjust its size according to the dimensions you wish to work with.
Now we’re going to transfer both images to the newly created file. There are two ways to do this:
1º. Use the drag and drop tool (Imagen4) to place the image on top of the blank file. OR
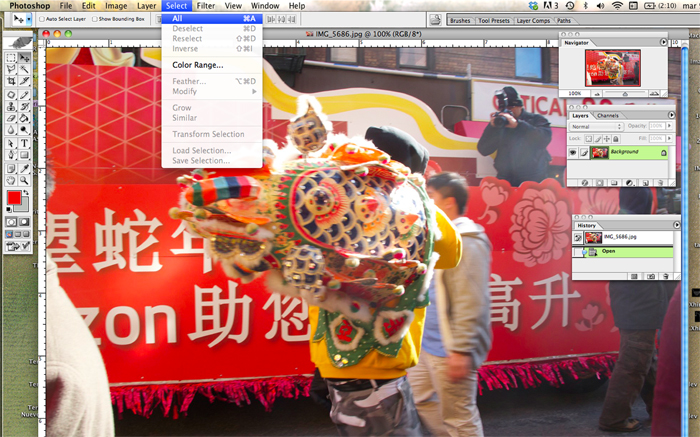
2º. Use the Select tool to select the whole image, and then copy and paste it onto the new file.
Now that we have the two images that we want to combine on the new blank canvas, we have to think about the composition we want to create. I am going to work with an easy one today in order to familiarise ourselves with the tools. We will look at more complex compositions in future tutorials.
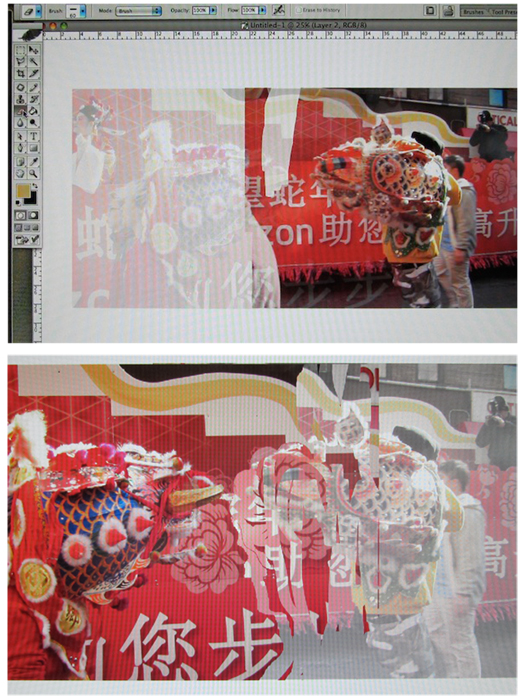
Before starting to work on the combined image, I find that using transparency helps me to join the images more accurately.
So, how do you change the transparency of a layer? First we go to menu and open the layers window and select the layer we want to change. Once this layer is unblocked or active, we go to the Opacity option and change its value.
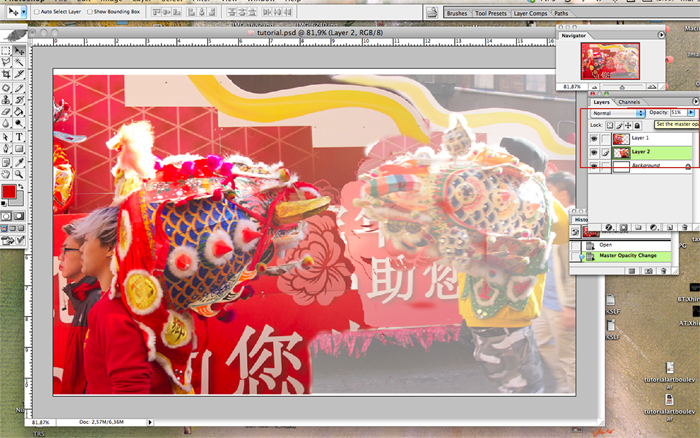
When both images are more transparent, we can start work by using the eraser tool to get rid of the parts that we don’t need.
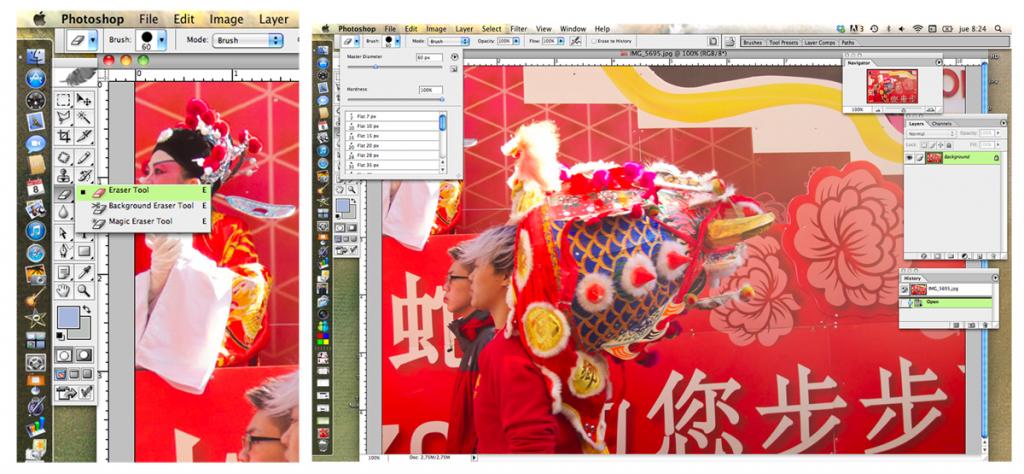
To activate the eraser tool, click on the icon as shown in the above image. The menu will also allow you to adjust the size of the eraser. I often start working with a bigger one to erase larger areas that I don’t need and then I reduce it for the more detailed sections.
This is the more artistic and intuitive part of this process.
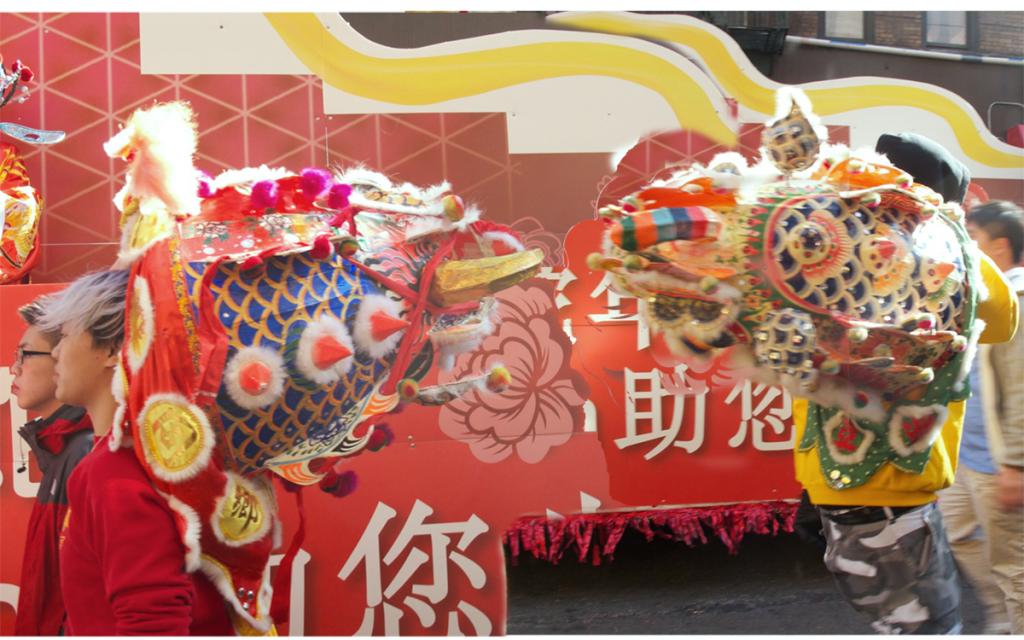
Now we have the new combined image.
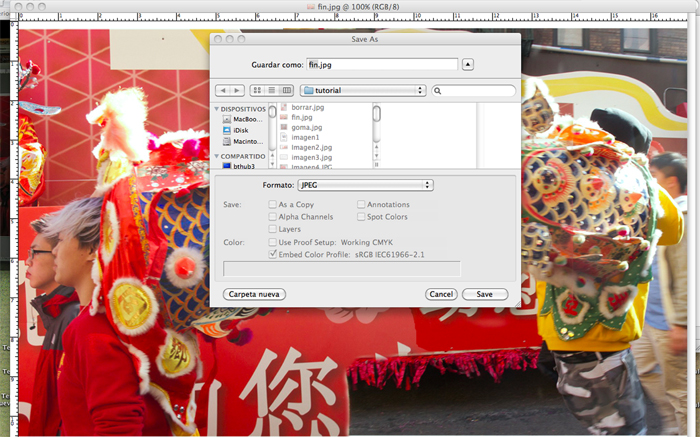
Before saving it in JPEG format, we have to change the transparency back to what it was at beginning by repeating what we did before but this time increasing the value instead of reducing it.
To finish, we adjust the size of the new image and save it as a JPG file.
Read more: Susana López, spotlight artist by Debut Contemporary (London).